
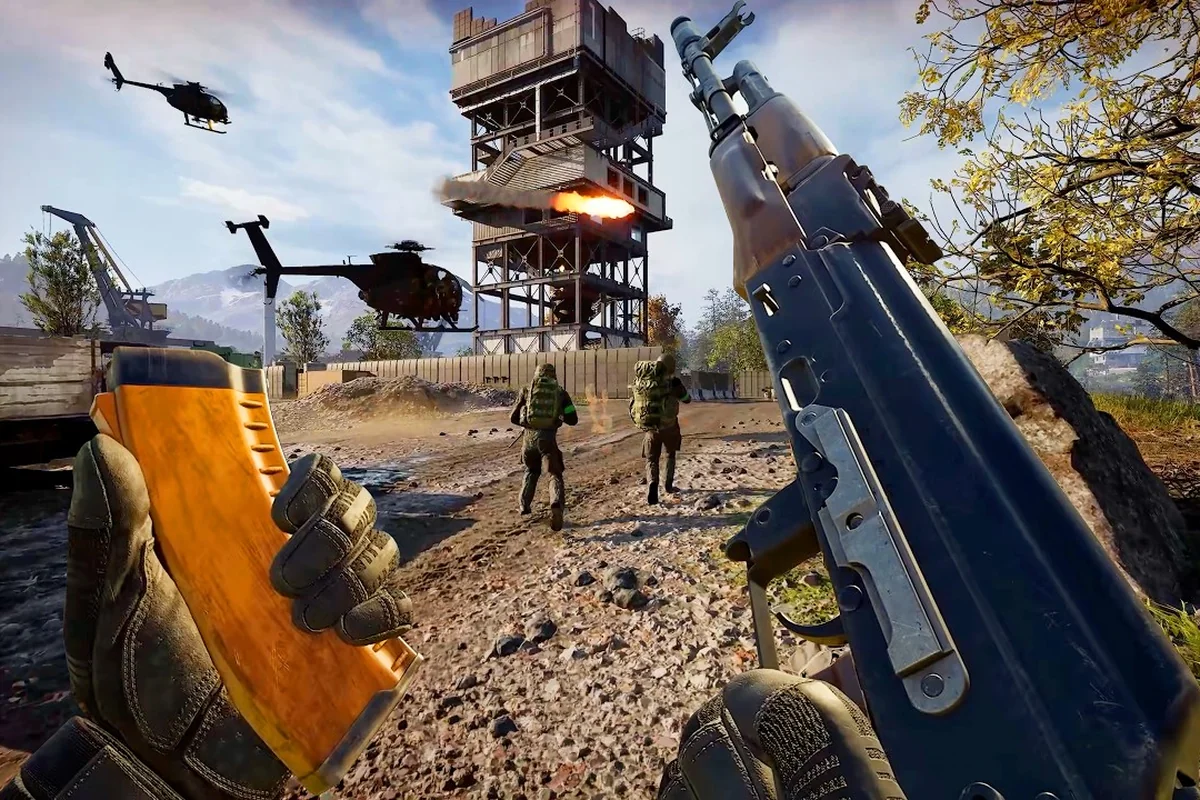
Winning fights in WARDOGS often comes down to who reads the terrain faster, not who has the better aim. These WARDOGS map tips break down the eastern europe map, industrial zones, mountain passes, and urban blocks so you can exploit every fold of the battlefield. Because the 2x2km Control Zone shifts every match, understanding the underlying map overview is the difference between farming cash and feeding the enemy team.
The game drops you into a 256km² destructible battlefield set in the derelict industrial mountains of Eastern Europe, according to the official WARDOGS Steam page. Three teams of up to 100 players fight for a randomized Control Zone, and the team holding the most players inside earns points. That means map knowledge directly translates into income, since the Hot Zone pays double cash. If you want to build a sustainable economy, you need to know where the zone can spawn and how to move through each terrain type before the fighting starts.
WARDOGS Map Overview: Reading the Eastern Europe Battlefield
The eastern europe map is not a single static layout — it is a rotating sandbox where the Control Zone spawns in different sectors of the 256km² play area. Each sector carries its own terrain identity, and the map rotation determines which biome you fight in for that match. According to the Team17 official game page, the randomized zone location plus individual tactics mean no two matches play the same, so you cannot rely on memorized callouts alone.
Understanding the map overview starts with recognizing the four dominant terrain archetypes you will encounter. Each one demands a different approach to movement, sightlines, and vehicle usage. Players who treat a mountain pass like an urban street will get picked apart by snipers, while those who push an industrial yard with infantry-only tactics will get shredded by armored vehicles.
| Terrain Type | Dominant Features | Best Approach | Primary Threat |
|---|---|---|---|
| Industrial | Warehouses, cranes, shipping containers | Close-quarters squad pushes, building fortification | Ambushes around blind corners |
| Mountain | Ridgelines, rock outcroppings, narrow passes | Long-range engagement, high-ground control | Sniper fire, vehicle flanks |
| Urban | Apartment blocks, streets, rubble piles | Vertical play, rooftop control, building demolition | Campers, rocket launcher traps |
| Mixed Transition | Open fields, scattered cover, road networks | Vehicle transport, fast repositioning | Armored patrols, open-fire zones |
The map rotation cycles through these archetypes rather than repeating a single layout, which keeps the meta fresh but also punishes players who only practice one style. A squad that dominates the industrial map will struggle when the rotation shifts to mountain passes, because the engagement distances change dramatically. That is why flexible loadouts and adaptable squad roles matter more than raw mechanical skill.
Control Zone spawns follow a semi-random pattern that favors the map edges, based on community reports from the closed beta. The zone rarely spawns dead center, which means teams that control the perimeter roads can rotate faster than teams stuck in the middle. Learning the spawn logic helps you pre-position vehicles and infantry before the zone even appears on your HUD.
Industrial Map Tactics: Close-Quarters Dominance
Industrial Close-Quarters: Fortifying Chokepoints with FOBs
The derelict industrial mountains funnel combat through tight factory corridors and warehouse interiors, making chokepoint fortification the highest-ROI play. Build a forward operating base at a corridor junction to block the most direct enemy route into the Control Zone. Rocket launchers destroy apartment blocks and industrial structures, so never rely on static cover—the world reacts to player presence, and a collapsed building can open a new flank. Pair FOB construction with proximity voice chat callouts to coordinate which chokepoint to hold. A fortified FOB forces enemies to burn rockets clearing it, wasting the cash they'd otherwise spend on vehicles or ghillie sniper loadouts.
Urban Vertical Destruction: Apartment Block Demolition Tactics
Urban maps reward vertical control, but WARDOGS' destructible battlefield means your rooftop position has a shelf life. Rocket launchers can level apartment blocks, and enemies will do exactly that to deny your elevation. Use the first 30 seconds of a match to identify which buildings overlook the Control Zone, then fortify the one with the most covered escape routes. When defending, pre-place explosives on support columns of the building you hold—if overrun, detonate to collapse the structure on advancing enemies, denying them the position and any cash they'd earn from controlling it. This demolition play converts a lost rooftop into a multi-kill ambush.
The industrial map is the most forgiving for new players because it offers abundant cover and short sightlines, but it is also the most punishing for careless movement. Warehouses and shipping containers create a maze of blind corners where a single shotgun or SMG player can wipe an entire squad. The key to dominating this terrain is sound discipline — footsteps echo loudly on metal surfaces, and experienced players will track you through walls.
When you spawn into an industrial sector, your first priority should be identifying the building fortification points. The destructible environment means you can create your own sightlines by blasting holes through warehouse walls with rocket launchers or tank shells. According to the Steam description, players can build upon and fortify key map locations for tactical advantage, which turns a simple warehouse into a defensive stronghold.
| Industrial Structure | Tactical Value | Weakness | Counter-Strategy |
|---|---|---|---|
| Shipping Container Stack | Excellent cover, multiple levels | Traps you in tight corridors | Use grenades to flush out campers |
| Warehouse Interior | Safe from air attacks, good ambush spots | Limited escape routes | Breach from multiple entrances |
| Crane Platform | High ground over the whole yard | Exposed ladder approach | Sniper cover while climbing |
| Rubble Pile | Natural ramp to second floors | Unstable cover, gaps in protection | Suppressive fire while advancing |
The industrial map rewards squads that move as a unit rather than lone wolves. Because the engagement distances rarely exceed 50 meters, communication about enemy positions becomes critical. One player calling out a contact behind a container stack can save the entire squad from an ambush, while a silent squad will get picked apart one by one.
For vehicle players, the industrial yard offers a mixed bag. The open central lanes allow jeeps to move quickly between objectives, but the narrow alleys between warehouses are death traps for anything larger than a technical. Armored vehicles should stick to the perimeter roads and provide fire support from range, while infantry clears the interior. This division of labor is covered in more depth in the vehicle tactics guide, which breaks down how to coordinate armor and foot soldiers effectively.
Mountain Map Strategy: Controlling High Ground
The mountain map flips the industrial playbook on its head. Instead of close-quarters brawls, you are fighting at engagement distances of 200 meters or more, where bullet drop and positioning decide every fight. The ridgelines and rock outcroppings create natural chokepoints that funnel attackers into kill zones, and the team that controls the high ground typically controls the match.
Your first move on the mountain map should be securing the dominant ridgeline overlooking the Control Zone. From there, you can spot enemy movements, call out targets for your team, and provide covering fire for advancing squads. The team that reaches the ridge first gains a massive advantage, so vehicle transport becomes essential — a jeep can carry a squad to the ridge in seconds while infantry would take minutes climbing.
| Mountain Position | Elevation Advantage | Exposure Risk | Best Class Fit |
|---|---|---|---|
| Main Ridge | Full zone visibility | Long approach, easy to spot | Sniper, Spotter |
| Rock Outcropping | Partial cover, good flank angle | Limited escape routes | Rifleman, Grenadier |
| Valley Floor | Concealed movement | No elevation advantage | Assault, Medic |
| Cliff Edge | Extreme vertical advantage | Fall risk, exposed rear | Sniper, Recon |
The mountain map punishes aggressive pushes without recon. Because the terrain is so open, a squad sprinting across a valley will be visible from multiple ridges simultaneously, making them easy targets for coordinated fire. Instead, use the rock outcroppings as staging points, moving from cover to cover while a spotter watches the ridgelines above.
Vehicles on the mountain map serve a different purpose than in industrial zones. The steep terrain limits where tanks and trucks can travel, but the open roads that do exist become critical supply lines. A truck ferrying reinforcements to the ridge can turn the tide of a fight, but it needs infantry escort to avoid ambushes at the narrow passes. The mountain passes are the most dangerous points on the map because they funnel all traffic through a single choke, making them prime ambush locations for both sides.
Urban Map Guide: Vertical Combat and Destruction
Hot Zone Double-Cash Rotation: The 2x2km Zone Math
The randomised 2x2km Control Zone sits inside a 256km² map, meaning only 1.56% of the total terrain is ever contested at once. When the Hot Zone marker lands on your sector, every teamplay action inside it—reviving, transporting squadmates, controlling objectives—pays double cash on top of your persistent $10,000 starting bankroll. Prioritise Hot Zone rotations over static defence: a single revive inside the zone nets roughly twice the cash of an outside kill, accelerating your next loadout purchase. Track the zone's randomisation each match; no two Control Zone placements play identically, so pre-planning two alternate routes to the Hot Zone prevents wasted rotations.
Mountain High-Ground Control: Ghillie Sniper Overwatch
Mountain peaks offer sightlines across the 2x2km Control Zone, but exposed ridgelines make you vulnerable to counter-snipers. Equip a ghillie suit and position 100-150m off the crest line, using the industrial ruins as natural concealment. From this perch, you can call out enemy rotations into the Hot Zone via proximity voice chat while picking off targets pushing the objective. The persistent economy punishes reckless sniping—a death costs you your loadout investment, so relocate after every 2-3 kills. Coordinate with a helicopter teammate to ferry you between peaks, turning your overwatch position into a mobile asset that controls high ground across multiple zone rotations.
The urban map is the most complex terrain in WARDOGS because it combines close-quarters combat with vertical gameplay and destructible environments. Apartment blocks rise several stories high, and each floor offers different sightlines and tactical options. The team that controls the rooftops controls the streets below, but rooftop players are vulnerable to building demolition — a well-placed rocket can collapse an entire structure and kill everyone inside.
When fighting in the urban map, you need to think in three dimensions. The streets are kill zones where snipers from upper floors can dominate, so smart players move through building interiors and rubble piles instead. The destructible apartment blocks are both a threat and an opportunity — you can blast new entrances into buildings, create sightlines through walls, or collapse structures on top of enemy squads.
| Urban Feature | Offensive Use | Defensive Use | Demolition Risk |
|---|---|---|---|
| Rooftop | Sniper perch, drop attacks | Hard to reach, clear sightlines | High — collapse kills everyone |
| Ground Floor | Quick entry, room clearing | Easy to breach, limited cover | Medium — walls can be blasted |
| Basement | Hidden movement, flank routes | Safe from air, hard to flush | Low — underground protection |
| Rubble Pile | Ramps to higher floors | Natural cover, firing positions | Medium — unstable structure |
The urban map rewards players who use the destruction mechanics creatively. Instead of fighting through the front door of an apartment block, blast a hole in the side wall and enter from an unexpected angle. Instead of peeking a window to spot enemies, shoot through the wall to suppress them. The environment is a weapon, and the players who understand that will always have the advantage.
For squads, the urban map demands a combined-arms approach. One team should hold the rooftops for overwatch, another should clear the ground floors, and a third should secure the perimeter roads against vehicle attacks. This coordination is complex, which is why the urban map tends to produce the most lopsided matches — teams that coordinate dominate, while teams that scatter get eliminated one by one. If you want to practice this coordination, the map tactics guide offers drills for synchronized pushes and defensive holds.
Map Rotation and Zone Control: Adapting on the Fly
The map rotation in WARDOGS does not follow a predictable schedule, which means you need to adapt your strategy within the first minute of each match. The Control Zone spawns somewhere in the 2x2km area, and the terrain around that zone determines how the fight will play out. A zone in an industrial yard demands close-quarters loadouts, while a zone on a mountain ridge demands long-range precision.
Your squad should have a pre-match routine for reading the zone and adjusting your approach. Start by checking the zone location on your map, then identify the dominant terrain features around it — buildings, ridges, open fields, chokepoints. Based on that assessment, adjust your loadouts and vehicle choices before you even leave the spawn area.
| Zone Location | Recommended Loadout | Vehicle Priority | Initial Move |
|---|---|---|---|
| Industrial Yard | SMG, Shotgun, Grenades | Jeep for quick entry | Secure warehouse perimeter |
| Mountain Ridge | Sniper, DMR, Spotter | Truck for supply drops | Claim the dominant ridge |
| Urban Center | Assault Rifle, Rocket Launcher | Armored vehicle for support | Take rooftop overwatch |
| Open Field | LMG, Marksman Rifle | Jeep for mobility | Flank to the zone edge |
The control zone rotation also affects the Hot Zone, which pays double cash. Since the Hot Zone shifts periodically, teams that track its movement can farm cash efficiently by repositioning before the zone changes. This is where the contested zones guide becomes valuable — it breaks down how to read zone rotation patterns and position your squad for maximum income.
One of the most common mistakes players make is committing too heavily to a single position. When the zone rotates, the terrain you were defending becomes irrelevant, and the team that repositions fastest gains a massive advantage. Keep vehicles nearby for quick extraction, and never let your squad get so entrenched that you cannot move when the zone shifts.
Advanced Terrain Exploitation: Making the Map Work for You
Beyond the basic terrain types, WARDOGS offers advanced tactical options that separate good players from great ones. The destructible environment is the most powerful tool in the game, because it lets you reshape the battlefield to your advantage. A squad with rocket launchers can create new sightlines, block enemy routes, or collapse buildings on top of defenders.
The eastern europe map setting is not just cosmetic — the industrial ruins and mountain terrain create unique tactical opportunities that you will not find in other shooters. The derelict factories offer multi-level combat with catwalks and control rooms, while the mountain passes create natural funnels that can be defended by a single squad. Learning these environmental quirks gives you an edge that no amount of aim training can match.
| Advanced Tactic | Terrain Requirement | Execution | Payoff |
|---|---|---|---|
| Building Collapse | Urban apartment block | Rocket the support columns | Kills defenders, blocks routes |
| Ridge Flank | Mountain ridgeline | Long approach under cover | Surprise attack from behind |
| Container Tunnel | Industrial container stack | Blast through container walls | Hidden movement route |
| Rubble Ramp | Destroyed building | Blast a ramp into the rubble | Unexpected high-ground access |
Building fortification is another advanced technique that turns the terrain against your enemies. By placing sandbags, barriers, and other structures at key chokepoints, you can funnel enemy movement into kill zones and protect your squad from incoming fire. The building strategies guide covers the full catalog of structures and their tactical applications, but the core principle is simple: control the terrain, control the fight.
The map overview also includes environmental hazards that experienced players exploit. The industrial map has fuel tanks that explode when shot, the mountain map has unstable rock formations that can be triggered by explosives, and the urban map has gas lines that run through apartment blocks. These hazards are not random — they are placed deliberately by the developers to create tactical options, and the players who learn their locations gain a significant advantage.
Frequently Asked Questions
What is the best map for beginners in WARDOGS?
The industrial map is the most beginner-friendly because its close-quarters layout reduces the impact of long-range skill gaps. New players can contribute by holding angles and clearing rooms with shotguns or SMGs, without needing to master bullet drop or long-distance aim. The abundant cover also makes it more forgiving of positioning mistakes.
How does the map rotation work in WARDOGS?
The map rotation is semi-randomized, with the Control Zone spawning in different sectors of the 256km² battlefield each match. The terrain around the zone determines the engagement style, so players must adapt their loadouts and tactics on the fly. The Hot Zone shifts periodically during matches, rewarding teams that reposition quickly.
Can you destroy buildings on the eastern europe map?
Yes, the eastern europe map is fully destructible. Apartment blocks, warehouses, and industrial structures can be collapsed with rocket launchers, tank shells, or explosives. This creates tactical opportunities like creating new sightlines, blocking enemy routes, or killing defenders by collapsing buildings on top of them.
What is the best vehicle for mountain maps?
Jeeps are the best choice for mountain maps because they can navigate steep terrain and transport squads to high-ground positions quickly. Trucks are useful for supply runs but are vulnerable to ambushes at narrow passes. Armored vehicles struggle with steep slopes and are better suited to the open roads of industrial or mixed terrain.
How do I earn more cash from the Hot Zone?
The Hot Zone pays double cash, so positioning your squad inside it is the fastest way to build wealth. Track the zone rotation and reposition before it shifts to maintain your presence. Teamplay actions like reviving teammates and transporting squadmates also earn cash, so coordinate with your squad to maximize income while holding the zone.