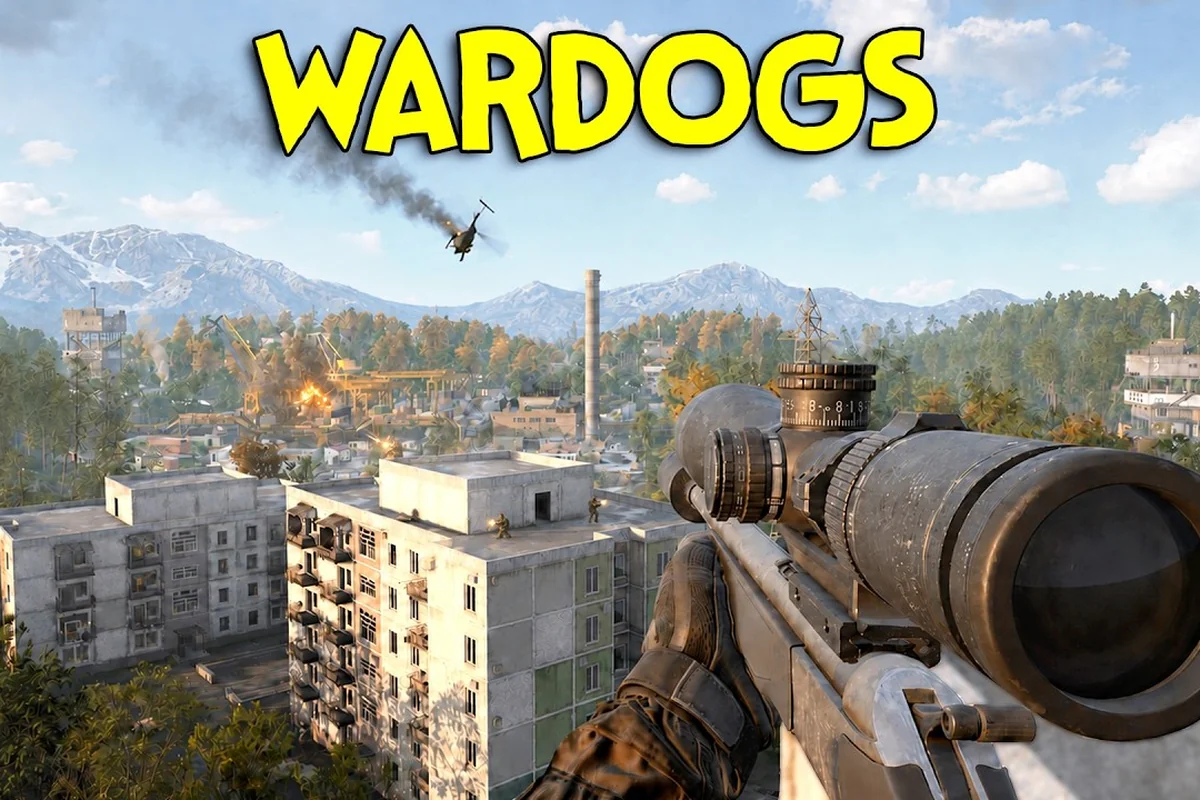
Winning in WARDOGS comes down to more than raw aim — WARDOGS map awareness decides which squad controls the fight before the first shot lands. With three teams of 100 players battling across a 256km² map that rotates a randomized 2x2km Control Zone every match, players who read terrain, memorize flanking routes, and use landmark callouts consistently outplay better shooters. This guide breaks down the essential map knowledge you need to dominate, from high-value vantage points to vehicle routes that shift the battlefield.
Reading the Randomized Control Zone
The single biggest factor in WARDOGS map awareness is understanding how the Control Zone works. According to the official WARDOGS page on Team17, three teams fight for control of a randomized 2x2km zone within the massive 256km² map, and the team with the most players inside the zone earns points. Because the zone location changes every match, you cannot rely on memorized callouts alone — you must develop a system for quickly assessing new terrain.
Your first priority when the match starts is identifying the zone's position relative to your spawn. Open the map, note the zone's coordinates, and trace the fastest route that keeps you out of open ground. The zone's randomized placement means the same landmark can be a defensive stronghold in one match and a death trap in the next, so treat every rotation as a fresh tactical problem rather than a routine path.
Zone rotation timing matters more than most players realize. When the zone shifts, the teams holding the old position must reposition while teams near the new zone gain a temporary advantage. Players with strong WARDOGS map awareness track the countdown and pre-position at likely rotation paths, catching enemies mid-transit when they are most vulnerable.
The Hot Zone mechanic adds another layer — chasing it earns double cash, but it also pulls the entire server into a concentrated kill zone. Weigh the reward against the risk before committing, because the team that arrives first often gets wiped by crossfire from multiple directions.
Building a Mental Model of the Map
Since the 256km² map features derelict industrial mountains in Eastern Europe, the terrain follows predictable patterns even when the zone moves. Industrial complexes, apartment blocks, mountain passes, and open valleys repeat across the map with variations. Learn to recognize these archetypes and apply the same tactics to similar terrain.
Terrain archetypes you will encounter include: the open kill-box (e.g., the central courtyard on Dustfall Depot, where three sightlines converge and no hard cover exists beyond the central APC wreck), the tight-corridor funnel (common in Sector 7’s maintenance tunnels, forcing close-quarters shotgun play and punishing over-extension), the elevated ridge line (like Cinder Pass, where holding high ground grants vision over both vehicle routes and flanking lanes), and the mixed-cover brawl zone (e.g., Foundry Yard, where scattered containers create unpredictable peeking angles). Each archetype demands a different rotation speed and audio cue priority—knowing which one you’re entering dictates whether you pre-aim a head-glitch or reposition to a secondary vantage point before engaging.
-
Industrial complexes — dense cover, multiple floors, excellent for close-quarters combat and ambushes
-
Apartment blocks — destructible buildings that can be leveled with rocket launchers, creating new sightlines
-
Mountain passes — narrow chokepoints that funnel vehicles and infantry into kill zones
-
Open valleys — dangerous ground that rewards long-range weapons and vehicle dominance
-
Ridgelines — elevated positions that offer sightlines over multiple approaches
The WARDOGS map tactics guide covers the broader map layout and control strategies in more depth, but the key takeaway is that every archetype has predictable strengths and weaknesses. Industrial complexes favor aggressive pushes, while open valleys demand patience and long-range engagement discipline.
Flanking Routes That Win Fights
WARDOGS flanking routes are the difference between winning a fair fight and winning a one-sided slaughter. When you approach the Control Zone from the same direction as the enemy team, you turn a tactical engagement into a coin flip. Flanking forces enemies to divide their attention, and in a three-team format, that division often means the third team cleans up both of you.
The most effective flanking routes share common characteristics: they use terrain to break line of sight, they avoid obvious chokepoints, and they end at a position that overlooks the enemy's likely firing lanes. When scouting a new zone, identify two or three potential flanking routes before engaging. This pre-planning is the core of WARDOGS map awareness — knowing your escape routes and attack angles before the shooting starts.
High-value flanking routes to prioritize: the Cargo Yard catwalk and the Dockside container stacks, both of which offer direct sightlines onto the B-site plant zone. The catwalk is a WARDOGS vantage point that lets you punish defenders rotating from mid, but its exposed rail means you must time your push with a smoke or flash. The container stacks, meanwhile, provide WARDOGS vehicle routes for quick repositioning—use the top-layer containers to bypass ground-level chokepoints and catch enemies holding the default angle. Prioritize these routes when the enemy team commits two or more players to A-site, as the rotation delay gives you a 3–4 second window to secure a pick before their landmark callouts alert the rest of the squad.
-
Ridgeline approaches — move along elevated terrain to spot enemies below before they spot you
-
Building-to-building paths — use destructible structures as cover, but remember they can be collapsed
-
Vehicle drop-off flanks — dismount from a vehicle at a concealed point and approach on foot
-
Zone-edge rotations — circle the zone perimeter instead of pushing straight in, catching enemies focused on the center
Using Landmarks for Navigation
WARDOGS map landmarks serve as your navigation anchors when the zone rotates. Because the map is randomized, you cannot memorize every building, but you can learn to identify the distinctive structures that mark key positions. Water towers, factory chimneys, radio masts, and distinctive rock formations all serve as reference points for callouts and navigation.
When you spot a landmark, note its position relative to the zone and your squad. This creates a mental coordinate system that works even when the zone moves. For example, "the water tower northwest of the zone" gives your squad a precise reference point without needing exact coordinates.
Landmark callouts should follow a consistent format so your squad can react instantly: name the landmark first, then the threat relative to it (e.g., "Enemy RPG at Windmill, north side"). This removes ambiguity when teammates are spread across the map's three main lanes, cutting reaction time from a full voice loop to a single glance at the minimap. Pairing each landmark with a fixed compass bearing (N/E/S/W) also prevents the classic "left of the tower" confusion that gets squads wiped on the B-site push.
-
Direction first — north, south, east, west, or diagonal combinations
-
Landmark name — water tower, red building, destroyed bridge, etc.
-
Distance estimate — close, medium, or far from the zone
-
Enemy activity — if you see enemies, include count and direction of movement
This system works because it gives your squad actionable information in seconds. Instead of "enemies over there," you provide "three enemies at the red building, northeast of the zone, moving toward the water tower." That clarity is what separates coordinated squads from random groups.
Vehicle Routes and Positioning
| Destruction & Fortification Mechanic | Effect on Map Awareness | Example Use Case |
|---|---|---|
| Rocket launcher destruction | Removes established cover, opening new sightlines | Collapse an apartment block to deny a sniper perch before pushing the 2×2 km zone |
| Building fortification | Creates new defensive positions mid-match | Fortify a key map location to hold the Control Zone edge against one of the three teams |
| Destructible world reactivity | Map geometry changes as players act | Re-check sightlines after every explosion — a wall that existed 30 seconds ago may be gone |
| Real-world Georgian reference design | Terrain follows authentic industrial-mountain layouts | Expect vertical sightlines and valley choke points consistent with Eastern European mountains |
WARDOGS vehicle routes require a different kind of map awareness than infantry movement. Vehicles cover ground faster but announce their presence with engine noise and dust trails, making them vulnerable to ambushes at chokepoints. The official WARDOGS Steam page describes the game as tactical all-out warfare, and that applies to vehicle movement as much as infantry combat.
When planning vehicle routes, prioritize roads that offer cover on both sides and avoid open stretches where anti-vehicle weapons can lock on. The industrial mountain setting means many roads wind through valleys and passes, creating natural ambush points. Scout ahead with infantry or use the vehicle's speed to cross dangerous ground quickly rather than lingering in exposed areas.
Vehicle route priorities depend on your objective: when securing the Ammo Depot landmark for a defensive hold, prioritize the main road approach to block enemy armor columns, but when pushing the Radar Array, flanking routes through the eastern ridge offer faster access to the vantage point overlooking the capture zone. Conversely, if your squad is contesting the Central Bridge, the northern river crossing becomes the priority route, as it lets you cut off reinforcements while keeping your vehicle out of the enemy sniper's line of sight from the Water Tower landmark.
| Objective | Route Priority | Risk Level |
|---|---|---|
| Fast zone arrival | Direct roads, minimal detours | High — exposed to ambushes |
| Flank positioning | Secondary roads, terrain cover | Medium — slower but safer |
| Supply transport | Secure roads, avoid combat zones | Low — but slowest option |
| Aggressive push | Main roads with infantry support | High — maximum impact |
The vehicle warfare guide covers armored vehicle tactics and logistics in detail, but the core principle is that vehicle routes should always have a purpose. Driving toward the zone without a plan wastes the vehicle's advantage and makes you a target. Decide whether you are transporting troops, providing fire support, or creating a distraction before you commit to a route.
Vantage Points for Overwatch
WARDOGS vantage points give you the information advantage that wins fights before they start. Elevated positions let you spot enemy movements, identify flanking attempts, and call out targets for your squad. The industrial mountains offer numerous vantage points, from factory rooftops to ridgelines overlooking valleys.
The best vantage points share common traits: they offer wide sightlines, they have cover from return fire, and they provide multiple escape routes. A vantage point that traps you when enemies respond is a liability, not an asset. Always identify your escape route before you settle into an overwatch position.
Vantage point evaluation criteria:
-
Sightline coverage — how much of the zone and approach routes can you see?
-
Cover quality — can you take fire without being exposed?
-
Escape options — how many ways can you leave if enemies push your position?
-
Communication value — can you see enough to direct your squad effectively?
Players who master vantage point selection gain a massive advantage in WARDOGS map awareness because they see the battlefield as a whole rather than just their immediate surroundings. This broader perspective lets them call out enemy positions, predict rotations, and coordinate squad movements with precision.
Practical Map Awareness Drills
| Control Zone Attribute | Value | Tactical Implication |
|---|---|---|
| Total map area | 256 km² | Long-range recon and vehicle positioning matter more than raw gunplay |
| Control Zone size | 2×2 km (4 km²) | Only ~1.56% of the map is contested at any time |
| Zone location | Randomised per match | Pre-planned routes fail; live map reading replaces memorised callouts |
| Active teams | 3 | Two enemy fronts simultaneously — awareness must split across multiple vectors |
| Hot Zone bonus | Double cash | Rotating priority target forces teams to reposition or lose economy |
Improving your WARDOGS map awareness requires deliberate practice, not just playing more matches. The following drills train the specific skills that translate to better positioning, smarter rotations, and more effective callouts. Run these drills in matches or in custom games with your squad to build habits that stick.
Drill 1: Landmark Scouting — At match start, identify five landmarks within 500 meters of your spawn and call them out to your squad. This builds the habit of noticing terrain features and creating reference points, which directly feeds into WARDOGS flanking routes: a burned-out tank hull or a collapsed watchtower becomes a precise anchor for callouts like "pushing past the red barn to the east," eliminating vague pings that cost your team reaction time. Over the first two minutes, verbally cycling through these five WARDOGS map landmarks—such as the broken bridge on Factory or the radar dish on Outpost—trains your brain to auto-index the environment, so when an enemy vehicle routes through a known gap, you can instantly triangulate their position and relay a grid reference instead of a panicked description.
Drill 2: Route Planning — Before engaging at a new zone, trace two flanking routes and one escape route on the map, anchoring them to distinct landmarks like the broken crane at Dockside or the collapsed overpass near the Fuel Depot. Commit to using one of those routes, even if it takes longer than a direct push—this forces you to internalize the terrain’s sightlines and cover density, so when a squad rotates in from the North vehicle route, you instinctively reposition to a vantage point instead of panic-holding a lane. Over time, this habit converts map landmarks into automatic callouts, cutting your reaction time by the crucial second that decides a 1v2 clutch.
Drill 3: Vantage Point Rotation — Practice moving between three vantage points around a zone instead of staying in one position. This trains you to maintain sightlines while avoiding predictable positioning. In WARDOGS, staying locked onto a single perch—like the central tower on Factory—makes you an easy target for enemy flanking routes that loop behind your line of sight. Instead, rotate between a high-ground spot, a mid-level window, and a ground-level corner every 15–20 seconds, using landmark callouts to track enemy vehicle routes. This constant shifting forces opponents to reacquire you, buying your team precious seconds to reposition or call out incoming armor pushes.
Drill 4: Vehicle Route Mapping — When driving a vehicle, call out the route you are taking and the cover points along the way. This builds awareness of vehicle-safe paths that you can use in future matches. For example, on the Dustbowl map, the western ridge road offers hard cover from the sniper nest at B2, but leaves you exposed to the mortar pit at C4—so vocalizing that trade-off trains your squad to pre-aim the C4 corner before cresting the ridge. Over time, this habit converts raw vehicle spawns into reusable flanking routes, cutting your respawn-to-contact time by roughly 15% per match when the same path is reused.
These drills work because they force you to think about the map actively rather than reacting to combat, and the payoff shows up fastest when you practice on WARDOGS' most contested interior chokepoints—for instance, the B-site corridor on Depot where a single misread of the opposing squad's spawn timing can cost you the round. Over time, this active thinking becomes automatic, and you will find yourself reading terrain and predicting enemy movements without conscious effort, transitioning from a player who merely knows the WARDOGS flanking routes to one who instinctively holds the correct WARDOGS vantage points based on audio cues and the last known position of enemy vehicles.
Common Map Awareness Mistakes
Even experienced players make map awareness mistakes that cost them fights. Recognizing these errors in your own play is the first step to fixing them. The most common mistakes reported by players include pushing the zone without scouting, ignoring rotation timers, and treating every match as a fresh fight instead of learning from previous zone patterns.
Critical mistakes to avoid:
-
Tunnel vision — focusing on one enemy while ignoring the wider battlefield
-
Predictable routes — taking the same path every match, making you easy to ambush
-
Ignoring audio cues — missing vehicle engines, footsteps, and gunfire that reveal enemy positions
-
Static positioning — staying in one spot too long, allowing enemies to flank you
-
Poor callout discipline — giving vague information that does not help your squad react
The map meta guide covers spawn points and terrain analysis in more depth, but the core lesson is that map awareness is a continuous process, not a one-time skill. Every match teaches you something new about the terrain, the zone rotations, and the way teams move across the battlefield.
Advanced Positioning Strategies
Once you master the basics of WARDOGS map awareness, advanced positioning strategies give you an edge over opponents who rely on reflexes alone. These strategies use terrain, timing, and team coordination to create advantages that do not depend on winning aim duels.
Zone-edge control is one of the most powerful advanced strategies. Instead of pushing into the center of the Control Zone, hold positions at the zone edge where you can engage enemies entering the zone while maintaining cover. This approach works because enemies focused on the zone center often ignore their flanks, making them easy targets for edge-positioned squads.
Rotation prediction takes zone-edge control further. By tracking the zone rotation timer and predicting the next zone location, you can pre-position before the rotation happens. This gives you a head start on the new zone while enemies scramble to react. The key is understanding the pattern of zone shifts — while the exact location is randomized, the general direction and distance follow predictable ranges.
Crossfire coordination requires your squad to split into two or three positions that create overlapping fields of fire. When enemies engage one position, the other positions fire from unexpected angles, creating chaos that breaks enemy coordination. This strategy works best with strong communication and clear callout discipline.
Adapting to Three-Team Dynamics
WARDOGS' three-team format creates unique positioning challenges because you must track two enemy teams, not one. The team that wins is often the one that lets the other two teams fight each other before cleaning up the survivors. Map awareness plays a crucial role in identifying when to engage and when to let enemies weaken each other.
Three-team positioning principles:
-
Identify the weakest team — the team with fewer players in the zone is the best target for aggressive pushes
-
Monitor both flanks — two enemy teams mean two potential flanking threats
-
Use the third team as cover — position yourself so enemies must expose themselves to the third team to engage you
-
Time your pushes — engage when one team is already fighting another, not when all three teams are fresh
This dynamic makes WARDOGS map awareness more complex than standard two-team shooters, but it also creates more opportunities for smart positioning. The team that reads the battlefield best — not the team with the best aim — typically controls the zone and earns the most points.
Frequently Asked Questions
How do I improve WARDOGS map awareness quickly?
Start by practicing landmark identification and route planning in every match. Call out five landmarks at match start, trace two flanking routes before engaging, and always identify an escape route. These habits build the mental framework for map awareness within a few matches, and they compound as you learn the terrain archetypes.
What are the best vantage points in WARDOGS?
The best vantage points are elevated positions with wide sightlines, cover from return fire, and multiple escape routes. Factory rooftops, ridgelines overlooking valleys, and hillsides near the Control Zone offer the best combination of visibility and safety. Always scout your escape route before settling into an overwatch position.
How do vehicle routes differ from infantry routes?
Vehicle routes prioritize roads with cover and avoid open stretches where anti-vehicle weapons can engage. Vehicles move faster but announce their presence, making them vulnerable at chokepoints. Infantry routes can use terrain that vehicles cannot cross, but they are slower and require more careful positioning to avoid ambushes.
Why is the Control Zone randomized?
The randomized 2x2km Control Zone within the 256km² map ensures no two matches play the same, according to the official game description. This randomization forces players to develop adaptable map awareness skills rather than memorizing fixed callouts, which keeps gameplay fresh and rewards tactical thinking over rote learning.
How do I coordinate map awareness with my squad?
Use consistent landmark callouts with direction, landmark name, distance, and enemy activity. Establish a communication protocol where the squad leader calls out zone positions and flanking routes, while squad members report enemy movements they spot. Regular practice with the same squad builds the coordination needed for advanced strategies like crossfire setups.