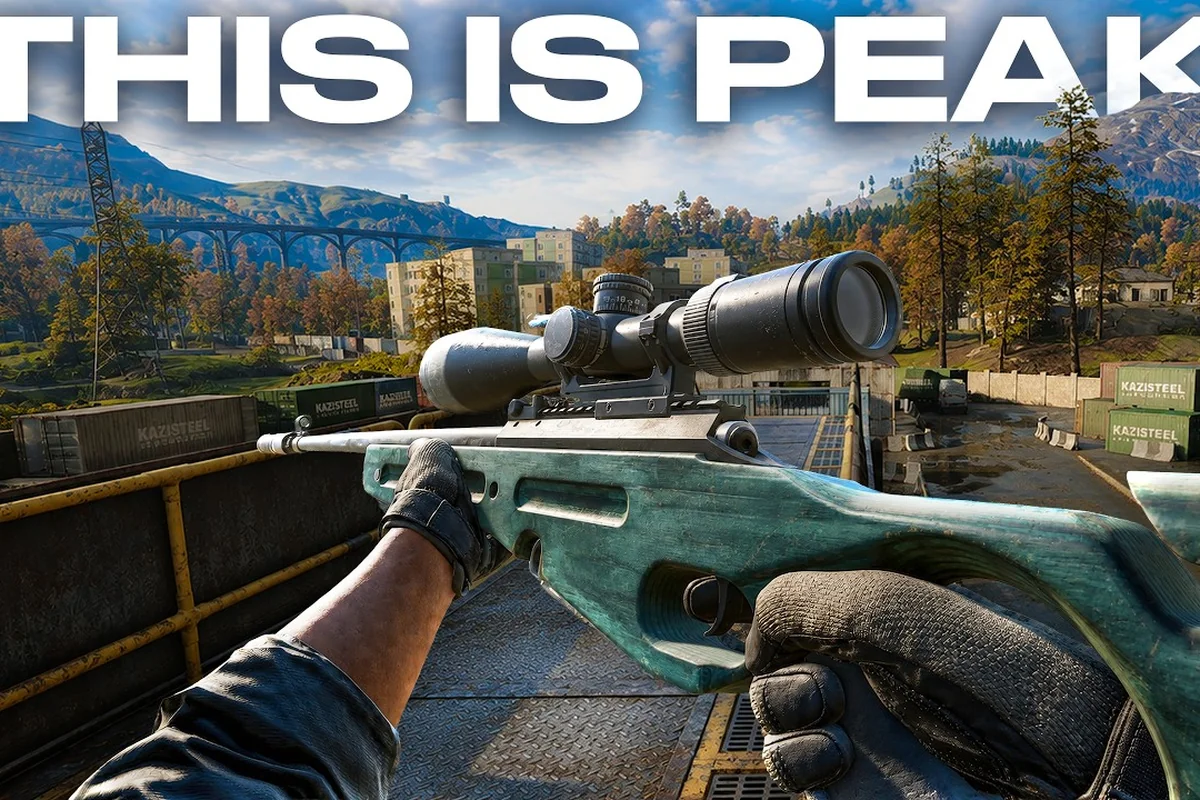
The WARDOGS sniper class is one of the most flexible roles in the game because it blends long-range elimination with battlefield intelligence. Unlike traditional shooters where snipers sit in a tower all match, WARDOGS rewards players who treat the ghillie suit as a tool for recon, not just camouflage. Every match starts with $10,000 in your account, and how you spend that cash on a sniper loadout determines whether you dominate the Hot Zone or become a free kill for a flanking infantryman. This WARDOGS recon guide breaks down the exact gear, positioning, and squad habits that separate a useful marksman from a liability.
The WARDOGS class system deliberately avoids rigid roles, so the sniper class is more of a playstyle than a locked archetype. According to the official WARDOGS Steam page, you can buy a ghillie suit and snipe from distance, ferry supplies by helicopter, or fortify a chokepoint by building a forward operating base — all in the same match. That freedom means your effectiveness as a sniper depends on reading the battlefield and adapting your loadout each life. This guide covers the essential WARDOGS ghillie suit loadouts, the best recon spots across common map layouts, and how to coordinate with your squad so your kills actually contribute to capturing objectives.
WARDOGS Sniper Class Fundamentals and Role Selection
The WARDOGS sniper class is not the default pick for new players, but it is the most impactful support role when played correctly. Your primary job is to control sightlines, deny enemy movement, and feed real-time intel to your squad while they push objectives. Because the game has no set rules of engagement, your role selection should shift based on the current objective, the terrain, and what your squad lacks at that moment.
Before you commit to the sniper class, understand what you are giving up. You cannot revive teammates as effectively as a medic, you cannot build fortifications like an engineer, and you will lose most close-quarters fights. However, you gain the ability to shape the battlefield from 200 meters away, which is something no other class can replicate. The WARDOGS class roles are designed to overlap, so a sniper who carries a secondary SMG and a medkit can still support a push when the situation demands it.
| Role Priority | Primary Task | Secondary Task | Best Loadout Focus |
|---|---|---|---|
| Pure Recon | Spot targets, mark enemies | Call out movement patterns | Ghillie suit + high-magnification scope |
| Counter-Sniper | Eliminate enemy marksmen | Protect squad flanks | Suppressor + spotter scope |
| Support Marksman | Cover advancing squad | Destroy enemy vehicles | Anti-materiel rifle + deployable shield |
| Aggressive Sniper | Push with squad, quick scopes | Flank and reposition often | Medium scope + SMG secondary |
The WARDOGS role selection process should start with a question: what does your squad lack? If your team has two medics and an engineer, the sniper class fills a genuine gap. If your squad is already full of passive players, you might be better off choosing an aggressive infantry loadout instead. The how to choose class guide explains this decision framework in detail, covering how to evaluate your squad composition before the match even starts.
Your first purchase each life should always be the ghillie suit because it changes how enemies perceive you on the battlefield. Without it, you are just another soldier with a long rifle, and experienced players will spot your silhouette against ridgelines instantly. The ghillie suit breaks up your outline and makes you nearly invisible at range, which is the single biggest advantage the WARDOGS sniper class has over other roles. Community reports consistently rank the ghillie suit as the highest-value first purchase for any recon-focused loadout, ahead of even the rifle itself.
Ghillie Suit Loadouts and Equipment Choices
Ghillie Suit Cost-Benefit vs. FOB Investment
The $10,000 starting balance forces a hard choice: a ghillie suit costs a meaningful chunk of that seed capital, while an Engineer's Forward Operating Base (FOB) at a chokepoint runs a similar budget. A sniper who spends on the suit forfeits vehicle or utility purchases for that life. However, the Hot Zone pays double cash, so a ghillie-clad sniper repositioning into the zone can recoup the suit's cost in a single high-value kill streak, whereas a static FOB generates passive income but locks you to one defensive position.
Revive-and-Spot Cash Flow for Recon Overwatch
Snipers earn cash not just from kills but from teamplay actions like reviving squadmates and controlling objectives. A recon overwatch position that covers a downed teammate's body can generate double income: the covering fire secures the area, then the revive action pays a cash reward. This creates a risk-reward loop where a sniper holds an angle not for the kill, but to enable a safe revive. In 100-player three-team matches, this cash flow sustains your loadout purchases without relying solely on kill confirms.
The WARDOGS ghillie suit is more than cosmetic camouflage; it directly affects how long you survive in contested areas. Players who skip the suit and buy a better scope first often die within the first two minutes because they get spotted while repositioning. The suit costs a meaningful portion of your starting $10,000, but it pays for itself by keeping you alive long enough to earn cash from teamplay actions and kill confirmations.
Your loadout should balance three things: concealment, detection range, and escape capability. A pure sniper loadout with the ghillie suit, a bolt-action rifle, and a high-magnification scope excels at long-range work but leaves you vulnerable if an enemy flanks your position. A hybrid loadout with a suppressor, a medium scope, and a compact SMG gives you more flexibility but reduces your effective range. The best WARDOGS sniper class loadouts adapt to the map and the objective, not the other way around.
| Loadout Type | Primary Weapon | Scope | Secondary | Best Map Type |
|---|---|---|---|---|
| Long-Range Recon | Bolt-action rifle | 12x magnification | Pistol | Open fields, large hills |
| Mid-Range Support | Semi-auto rifle | 6x magnification | SMG | Urban areas, mixed terrain |
| Counter-Sniper | Bolt-action + suppressor | 8x magnification | Pistol + smoke grenades | Ridgelines, elevated positions |
| Aggressive Push | DMR | 4x magnification | SMG + medkit | Forest, close-quarters zones |
The WARDOGS ghillie suit works best when paired with a rifle that matches your engagement distance. A bolt-action rifle with a 12x scope is devastating on open maps but nearly useless in urban combat where engagements happen under 50 meters. Semi-auto rifles trade raw damage for faster follow-up shots, which matters when you are engaging multiple targets in quick succession. Community testing suggests that most players perform better with a semi-auto rifle on their first few matches because it forgives missed shots and lets you learn bullet drop mechanics without punishing mistakes.
Your secondary weapon is not an afterthought; it is your survival tool. The WARDOGS sniper class becomes a liability the moment an enemy closes to within 30 meters, and your secondary is the only thing standing between you and a respawn screen. A compact SMG with a fast reload time gives you a fighting chance in close quarters, while smoke grenades let you break line of sight and reposition when your position is compromised. The WARDOGS class system encourages this kind of loadout flexibility, so do not feel locked into a pure sniper build just because you chose the role.
Positioning is the other half of the ghillie suit equation. The suit hides you from distant observers, but it does nothing against a player who walks directly into your hiding spot. Always keep an escape route in mind, and never stay in the same position for more than two or three kills. Veteran players recommend moving after every confirmed elimination because the kill cam and proximity voice chat give away your general location to the enemy team.
Best Recon Spots and Sightline Control
Finding the best recon spots in WARDOGS requires understanding how the Hot Zone mechanic shapes player movement. The Hot Zone pays double cash, which means players naturally funnel toward it, creating predictable traffic patterns that a sniper can exploit. The best positions are not always the highest points on the map; they are the spots that overlook the Hot Zone while offering multiple escape routes and natural cover.
Elevation is your friend, but it is also a trap. High ridgelines give you excellent sightlines, but they also silhouette you against the sky, which makes you visible to anyone looking up. The best recon spots use partial cover — a rock outcropping, a tree line, or a building corner — that breaks your outline while still giving you a clear view of the objective. The WARDOGS recon guide community consensus is that mid-elevation positions with natural cover outperform the highest peak on the map in almost every scenario.
| Map Feature | Advantage | Disadvantage | Best Use |
|---|---|---|---|
| High ridgeline | Maximum sightlines | Silhouetted against sky | Counter-sniping, long-range denial |
| Tree line edge | Natural cover, concealment | Limited visibility | Ambush positions, flank protection |
| Building rooftop | Urban sightlines, hard cover | Easy to corner | Hot Zone defense, squad support |
| Rock outcropping | Partial cover, elevation | Limited escape routes | Mid-range support, fallback position |
Your recon spots should always have a fallback position within 20 meters. If an enemy squad pushes your location, you need to relocate without exposing yourself to fire. A good fallback is a lower position with cover that lets you escape the engagement entirely, not just a different angle on the same fight. The WARDOGS sniper class excels at controlling space, but only if you can survive the counter-push that follows your first few kills.
Sightline control is about denying the enemy information as much as it is about getting kills. Every shot you take reveals your position, so smart snipers prioritize shots that matter: enemies moving toward the Hot Zone, enemy snipers lining up on your squad, and players attempting to flank your team's advance. Shooting at random targets across the map might get you kills, but it also broadcasts your location to every player within earshot. The best WARDOGS sniper class players think of every shot as a trade — you are trading your position for an enemy's life, and that trade only makes sense if the target is valuable.
Squad Coordination and Teamplay Actions
Hot Zone Sniping: Doubling Your Cash Per Kill
The Hot Zone is the sniper's highest-yield hunting ground, paying double cash for every elimination and teamplay action performed inside it. A standard kill outside the zone pays base rate; the same shot inside pays 2x. Since cash persists across matches, a disciplined sniper who rotates to follow the dynamic objective zone can out-earn a fragger farming kills elsewhere. Prioritize a ghillie suit and a long-rifle loadout when the Hot Zone favors open sightlines, and reposition before the zone shifts to maintain the multiplier.
Counter-Sniper Sightline Denial in Three-Team Matches
In 100-player three-team matches, the third faction turns every sightline into a three-way risk. A sniper holding a dominant recon spot must track two separate angles of approach, not one. The dynamic objective zones force all three teams to converge, creating crossfire opportunities but also exposing your position to a second enemy sniper. Advanced positioning means choosing spots with hard cover to one flank, so you only expose yourself to one opposing team at a time, preserving your ghillie suit's concealment advantage for the critical engagement.
The WARDOGS sniper class is often played as a lone wolf, but the game's economy actively rewards teamplay. Reviving squadmates, transporting teammates, and controlling objectives all earn cash, which means a sniper who supports the squad earns more money than a sniper who camps alone. The official Steam news post celebrating 500,000 wishlists highlighted that teamplay actions like reviving squadmates earn cash, reinforcing that the game design pushes players toward cooperation.
Your squad coordination starts before the match begins. Communicate your intended position to your squad leader so they know where to expect overwatch fire. If you are covering a push, tell them which sightlines you control and which angles are exposed. The proximity voice chat in WARDOGS makes this easy, but it only works if you actually talk. A silent sniper is just a less useful infantryman, while a communicative sniper becomes the squad's eyes on the battlefield.
| Teamplay Action | Cash Reward | How Snipers Contribute |
|---|---|---|
| Reviving squadmates | High | Cover medics while they revive |
| Transporting teammates | Medium | Call out safe landing zones |
| Controlling objectives | High | Deny enemy approaches to Hot Zone |
| Spotting enemy positions | Low but consistent | Mark targets for squad engagement |
The WARDOGS class roles overlap more than most players realize, and the best squads treat the sniper as a force multiplier rather than a separate unit. When your squad pushes an objective, your job is to suppress enemy defenders and eliminate anyone who tries to flank. When your squad is defending, your job is to spot incoming attacks and slow enemy advances with well-placed shots. The engineer loadout guide covers how other support roles create synergy with snipers, particularly when engineers build forward operating bases that give snipers a safe resupply point near the front line.
Cash management is a core part of the WARDOGS sniper class that new players often overlook. Every life, you start fresh with your account balance, and dying costs you your entire loadout investment. A sniper who dies with a $8,000 rifle loadout has effectively thrown that money away, while a sniper who survives multiple engagements with a modest loadout builds wealth over time. The game's economy rewards survival, so prioritize staying alive over getting kills, even when a tempting target presents itself.
The WARDOGS class system also means you can switch roles mid-match if the situation demands it. If your squad is getting overrun and needs another medic, sell your sniper rifle and buy a medkit. If the enemy has a helicopter dominating the map, switch to an anti-vehicle loadout and take it down. The flexibility is the point — WARDOGS does not lock you into a class, so the best players treat role selection as a continuous decision rather than a pre-match commitment.
Advanced Sniper Techniques and Positioning Strategy
Once you master the basics of the WARDOGS sniper class, advanced techniques separate you from average marksmen. Bullet drop compensation is the first skill to develop because WARDOGS does not use hitscan weapons; every shot travels with gravity and travel time. At 200 meters, you need to aim significantly above your target, and at 300 meters, the drop becomes extreme. Community testing suggests spending time in the practice range or early match minutes learning the drop curve for your preferred rifle.
The WARDOGS recon guide advanced section focuses on map knowledge and prediction. Learn the common movement routes players take toward the Hot Zone, then position yourself to intercept those routes. Players are creatures of habit, and most will take the shortest path to the objective, which means predictable sightlines are easy to farm if you know where to look. The best recon spots are not static; they shift as the Hot Zone moves and the battle lines change.
| Technique | Difficulty | Effectiveness | When to Use |
|---|---|---|---|
| Bullet drop compensation | Medium | High | All long-range engagements |
| Leading moving targets | Hard | Very High | Enemies crossing open ground |
| Quick-scope close range | Hard | Medium | Emergency self-defense |
| Relocate after kill | Easy | Very High | Every confirmed elimination |
| Spotter scope marking | Easy | High | Squad coordination, objective defense |
Positioning strategy in WARDOGS is about controlling space, not just finding a good angle. A sniper who controls a ridgeline denies the enemy access to an entire flank, which forces them to take longer routes that expose them to other squad members. This is the true value of the WARDOGS sniper class — you are not just getting kills, you are shaping the battlefield and making the enemy team's life harder. The weapons list guide covers the full range of sniper rifles available, including which ones excel at different engagement distances.
Counter-sniping is a specialized skill within the sniper role. When you spot an enemy sniper, your first instinct might be to engage immediately, but smart players wait and observe. Watch the enemy sniper's behavior for a few seconds — are they looking at your squad? Are they about to take a shot? If you can identify their position without them knowing, you have a massive advantage. The WARDOGS ghillie suit helps here because it keeps you hidden while you gather intel, and a patient counter-sniper can eliminate an enemy marksman without ever being detected.
Frequently Asked Questions
What is the best WARDOGS sniper class loadout for beginners?
Start with a semi-auto rifle, a 6x scope, and a compact SMG as your secondary. This loadout forgives missed shots while teaching you bullet drop mechanics, and the SMG keeps you alive when enemies close the distance. Skip the suppressor initially; it reduces damage and you need the practice with unsuppressed shots.
How does the WARDOGS ghillie suit actually work?
The ghillie suit breaks up your silhouette and makes you significantly harder to spot at range, especially against natural terrain like grass, trees, and rocks. It does not make you invisible, and players who walk directly into your position will still see you. The suit is most effective when you stay still and use natural cover.
Can I play the sniper class effectively without a squad?
Yes, but you will earn less cash because teamplay actions like reviving and transporting squadmates generate significant income. Solo snipers should focus on Hot Zone control and deny enemy approaches, which still contributes to the objective. Just expect slower progression compared to a sniper who coordinates with a squad.
How often should I relocate as a sniper in WARDOGS?
Move after every two or three confirmed kills, or immediately if you suspect an enemy knows your position. The kill cam and proximity voice chat give away your location, and staying in one spot makes you an easy target for counter-snipers. Relocating also keeps your sightlines fresh and unpredictable.
What is the best way to learn bullet drop in WARDOGS?
Spend your first few matches focusing on observation rather than kills. Take shots at different ranges and note where the bullets land, then adjust your aim accordingly. The practice range is also useful, but real match experience teaches you how player movement and map elevation affect your shots.