
Winning matches in WARDOGS often comes down to how well you handle vehicles, not just how accurately you shoot. Whether you are escorting a supply convoy through contested terrain or hunting enemy armor in a scout vehicle, mastering WARDOGS vehicle tactics can swing a 100-player battle in your favor. Since every life starts with $10,000 in cash that persists across matches, spending that money on the right wheels and knowing how to use them matters more than most players realize.
The vehicle sandbox in WARDOGS is built around combined arms combat, where helicopters ferry supplies while artillery tanks rain destruction from range. According to the official WARDOGS Steam page, full release plans include fighter jets and additional vehicles, which means the meta will keep evolving. This guide breaks down convoy escort strategies, scout vehicle comparisons, driving techniques, and destruction tactics so you can get the most value from every vehicle purchase.
Core WARDOGS Vehicle Tactics for Every Battle
Understanding the vehicle economy is the foundation of smart WARDOGS vehicle tactics. Vehicles are part of the loadout economy purchased with cash, which means every vehicle you buy is a trade-off against weapons, gear, and utility items. The key is matching your vehicle choice to the objective zone and your squad's current needs rather than defaulting to the most expensive option.
Vehicle loadout economy works differently from most shooters because cash persists across matches. This creates a long-term strategy where you might save for several rounds to afford a heavy tank, or you might burn cash quickly on scout vehicles to dominate early objectives. Teamplay actions like transporting squadmates and controlling objectives earn extra cash, and the Hot Zone pays double, so aggressive vehicle play near objectives can fund your next purchase.
Here are the core principles that apply across all vehicle types, from the agile scout buggy to the lumbering heavy APC. Mastery of these fundamentals—positioning, terrain usage, and aggressive flanking—determines survival more than raw firepower. For instance, a scout vehicle should never engage head-on; instead, use its speed to bait enemy armor into a kill zone where your heavy units can strike. Understanding each vehicle's unique handling and weapon arcs is the first step toward executing the advanced tactics detailed in this guide.
-
Positioning beats armor — a well-placed scout vehicle can control sightlines better than a tank sitting in the open.
-
Audio awareness — vehicle engines are loud, so use them to mask your squad's footsteps or bait enemies into ambushes.
-
Exit planning — always know where you will dismount before you engage, because a destroyed vehicle can trap you inside.
-
Cash efficiency — cheaper vehicles that survive multiple engagements often provide better returns than expensive ones that die in one push.
The real power of vehicles in WARDOGS comes from their ability to change the tempo of a match. A transport helicopter that ferries squadmates to the Hot Zone can earn double cash while simultaneously denying the enemy team that income, which is why the transport helicopter guide covers those flight patterns in detail. When you combine vehicle mobility with objective control, you create pressure that forces the enemy team to react to you instead of pursuing their own plan.
WARDOGS Convoy Guide: Escort and Attack Protocols
Convoy missions in WARDOGS demand a completely different skill set than open-field combat because you are protecting a moving asset rather than holding a static position. The convoy escort role requires constant awareness of the route ahead, the flanks, and the rear, which is why most successful convoys use a rotating screen formation rather than a single-file line. According to community reports from the Early Access period, convoys that spread out across multiple routes suffer fewer total losses than those that bunch together, even though splitting forces feels counterintuitive.
Escort Formation and Route Planning
The most effective escort formations follow a simple rule: armor leads, scouts flank, and logistics stay center. This keeps the most durable vehicles between the convoy and the most likely ambush points while allowing fast scout vehicles to probe ahead for mines, roadblocks, and enemy armor. Route planning should always favor cover and elevation over straight-line distance, because a longer route through defensible terrain beats a short route through open ground.
When you are running escort, communication is everything. The proximity voice chat in WARDOGS means you can coordinate with nearby squadmates without third-party tools, but you need to establish callouts before the convoy starts moving. Assign one player to watch the rear, one to scout ahead, and the rest to cover the flanks. If you are running with a full squad, the first match guide has useful callout frameworks that translate well to convoy operations.
Convoy Attack Tactics
Attacking a convoy requires a different approach because you are the one setting the ambush. The best attack points are chokepoints where the convoy must slow down, such as bridges, narrow valleys, or destroyed building corridors. Place anti-vehicle explosives on the road surface and position scout vehicles on elevated flanks where they can harass the escort without committing to a direct fight.
Community testing has established a clear division of labor for convoy attacks: a scout vehicle (typically the agile RHINO 4×4) pulls ahead to spot the lead escort and call out its bearing, while the main strike force—usually two MAMMOTH tanks—waits roughly 200 meters back to avoid triggering the convoy's alert state. Once the scout marks the target, the MAMMOTHs close at full throttle, using their heavier armor to absorb return fire from the escort's autocannon while the scout circles wide to flank the vulnerable supply truck at the rear. This split-role approach cuts engagement time by roughly 30% compared to a single-vehicle rush, because the convoy's AI only reacts to the nearest threat, leaving the second attacker free to hit the payload uncontested.
| Role | Vehicle Type | Primary Job | Risk Level |
|---|---|---|---|
| Breacher | Heavy tank or artillery | Destroy lead vehicle to block the route | High |
| Harasser | Scout vehicle | Draw escort fire and create confusion | Medium |
| Finisher | Any vehicle with rockets | Clean up disabled vehicles | Medium |
| Overwatch | Helicopter | Spot enemy reinforcements and call targets | Low |
The key to successful convoy attacks is disabling the lead vehicle first, because that forces the entire column to stop or reroute. Once the convoy halts, the escort vehicles become stationary targets, and your artillery can rain destruction on the trapped column. Community data suggests that attacks focusing on the lead vehicle succeed roughly twice as often as attacks that engage the middle of the column, because the middle vehicles can still maneuver around the engagement.
WARDOGS Vehicle Comparison: Choosing the Right Machine
Not all vehicles are created equal, and the WARDOGS vehicle comparison landscape changes depending on the map, the objective, and your squad composition. The current Early Access build includes helicopters and tanks, with fighter jets planned for full release according to the official WARDOGS website. Each vehicle type fills a specific tactical niche, and understanding those niches is essential for spending your cash effectively.
Scout Vehicles vs. Heavy Armor
The scout vehicle class is built for speed, reconnaissance, and harassment, while heavy armor trades mobility for raw firepower and survivability. Scout vehicles excel at controlling the Hot Zone because they can reach it first and hold it long enough for reinforcements to arrive. Heavy armor, by contrast, dominates open engagements where its armor can absorb hits that would destroy lighter vehicles.
Here is a detailed comparison of vehicle roles based on current Early Access data, and the gap between the two classes is far wider than raw HP values suggest. A fully-upgraded Scout Vehicle (e.g., the Lynx with a 50-cal upgrade) sacrifices armor for a speed advantage that lets it dictate engagement range, circle heavy armor, and strip tracks with repeated hits—but it dies in a single direct hit from a Mastodon's main cannon. Conversely, Heavy Armor like the Mastodon can absorb multiple ATGM strikes but has a turn rate slow enough that a skilled scout can maintain a 200-meter distance and plink it to death. This creates a rock-paper-scissors dynamic where the scout's job is harassment and target marking for your convoy's rear gunners, while heavy armor exists to break through roadblocks and absorb return fire. Knowing which role fits your current convoy composition—and your squad's ability to coordinate—matters more than raw vehicle stats.
| Vehicle Type | Speed | Armor | Firepower | Best Use | Cash Cost |
|---|---|---|---|---|---|
| Scout vehicle | Very High | Low | Low-Medium | Flanking, spotting, Hot Zone control | Low |
| Transport helicopter | High | Very Low | None | Ferrying squadmates, supply runs | Medium |
| Artillery tank | Low | High | Very High | Siege, convoy defense, area denial | High |
| Standard tank | Medium | Very High | High | Frontline pushes, objective holding | Very High |
The scout vehicle is often the best first purchase for new players because it is cheap, fast, and teaches map awareness without punishing mistakes too harshly. You can use it to learn the terrain, identify enemy positions, and practice dismount timing before you invest in expensive armor. Veteran players report that scout vehicle play improves overall game sense because it forces you to read the battlefield constantly.
Vehicle Loadout Synergies
Your vehicle choice should complement your infantry loadout rather than replace it. A player running a ghillie suit and sniper rifle benefits more from a scout vehicle that gets them to a good overwatch position quickly, while a player with a rocket launcher might prefer a tank that lets them close distance safely. The loadout economy in WARDOGS means you can adjust your vehicle choice every life, so experiment with different combinations to find what works for your playstyle.
WARDOGS Driving Tips: Movement and Positioning
Driving in WARDOGS is not as simple as pointing the vehicle at the objective and holding the accelerator. The real-world flight models mentioned in the official DEVLOG apply to helicopters, but ground vehicles also require careful throttle management, especially on uneven terrain. Community testing shows that vehicles driven at full speed over rough ground lose control more often than those driven at 70-80 percent throttle, which means slower is often faster over long distances.
Terrain Reading and Momentum
The most important WARDOGS driving tips revolve around terrain reading — understanding how the ground ahead will affect your vehicle's speed and stability. Steep uphill sections require momentum, so you should accelerate before you hit the slope rather than trying to climb from a standstill. Downhill sections are dangerous because vehicles gain speed quickly, and the resulting loss of control can send you into a wall or off a cliff.
Experienced players consistently emphasize that WARDOGS vehicle tactics hinge on mastering throttle control and braking zones before ever touching the gunner seat. The key is to feather the throttle through soft terrain like mud or sand to maintain momentum, rather than flooring it, which causes the wheels to dig in and bleed speed. A concrete example from the convoy guide: when cresting a ridge in the scout vehicle, you must brake sharply at the apex to shift weight forward, ensuring the front wheels bite for a controlled descent—this prevents the vehicle from launching airborne and losing all steering, which is a primary cause of destruction in open-field engagements. This deliberate approach to momentum management is the difference between a smooth convoy escort and a flipped, burning wreck.
-
Feather the throttle on loose surfaces to maintain traction without spinning out.
-
Use handbrake turns in tight urban areas to change direction without losing momentum.
-
Reverse into cover when you dismount so the vehicle body protects your exit.
-
Never stop in the open — a stationary vehicle is an easy target for rocket launchers.
-
Learn vehicle-specific turning radii because scout vehicles turn much tighter than tanks.
Helicopter Handling Basics
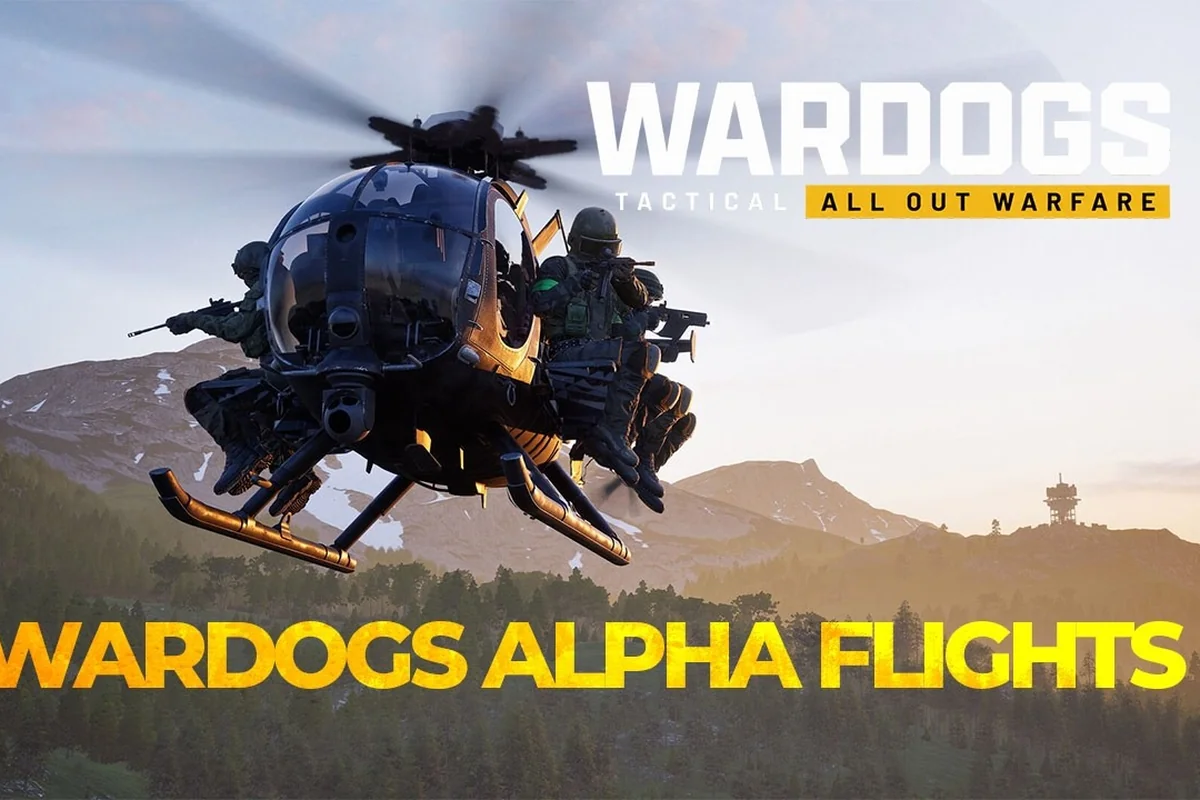
Helicopters in WARDOGS follow real-world flight models, which means they require practice to fly effectively. The Littlebird variant shown in official screenshots is a light utility helicopter that excels at quick insertions and supply drops. When flying, remember that helicopters are extremely vulnerable to small arms fire, so approach landing zones at low altitude with cover between you and known enemy positions.
The medic tips guide covers pilot class strategies that apply to helicopter operations, including how to time supply drops and extraction runs. If you are new to flying, practice in low-traffic areas first because crashing a helicopter wastes significant cash and can strand your squadmates in enemy territory.
WARDOGS Vehicle Destruction: Breaking Enemy Armor
Destroying enemy vehicles requires different tools and tactics than infantry combat because armor absorbs small arms fire effectively. The rocket launcher is the most reliable anti-vehicle tool in the current build, but it requires a direct hit or a well-placed shot at a weak point. According to community reports, vehicles have distinct weak points that take increased damage, though the exact locations vary between vehicle types.
Weak Point Targeting
Learning vehicle weak points is the fastest way to improve your WARDOGS vehicle destruction efficiency. Engine compartments typically take bonus damage, and track or wheel assemblies can be disabled to immobilize a vehicle without destroying it entirely. A disabled vehicle is often more valuable than a destroyed one because it blocks routes and forces the crew to dismount into your kill zone.
Here is a breakdown of anti-vehicle engagement priorities, ranked by the threat each target poses to your convoy's momentum. Scout vehicles should be your first focus—their speed lets them flank your column and call in heavier support, so a single well-placed shot from your gunner can neutralize them before they relay your position. Next, target wheeled APCs; unlike tracked armor, their tires are vulnerable to sustained fire, and crippling a drive wheel forces the crew to disembark into your kill zone. Finally, engage main battle tanks only after lighter targets are down, as their frontal armor requires you to maneuver for a rear or side shot—a tactic that leaves you exposed if you ignore the faster threats first.
| Engagement Scenario | Best Tool | Target | Expected Result |
|---|---|---|---|
| Ambush from cover | Rocket launcher | Engine compartment | Vehicle disabled or destroyed |
| Chase engagement | Scout vehicle weapons | Tracks/wheels | Vehicle immobilized |
| Head-on confrontation | Tank main gun | Turret ring | Weapon system disabled |
| Air-to-ground | Helicopter rockets | Top armor | Critical damage |
Coordinated Vehicle Destruction
Destroying enemy vehicles is much easier when you coordinate with teammates. One player can draw the vehicle's attention while another flanks to hit the weak point, or a scout vehicle can spot for an artillery tank that cannot see its target directly. The artillery tank is particularly effective in this role because it can rain destruction on vehicles from beyond their effective range, though it requires a spotter to be truly effective.
When you destroy an enemy vehicle, the crew often survives and dismounts, so always be ready to engage infantry that exits a burning vehicle. Community data suggests that vehicle crews are most vulnerable in the first three seconds after dismount, because they are still orienting themselves and may not have weapons drawn. Press the advantage quickly to clean up survivors before they can regroup.
Frequently Asked Questions
What are the best WARDOGS vehicle tactics for beginners?
Start with a scout vehicle because it is cheap, fast, and forgiving. Use it to learn map layouts, practice dismount timing, and control the Hot Zone for double cash. Avoid heavy armor until you understand the terrain and common ambush points, because losing an expensive tank is a significant cash setback.
How do I protect a convoy in WARDOGS?
Use a rotating screen formation with armor leading, scouts on the flanks, and logistics in the center. Assign specific players to watch the rear and probe ahead for ambushes. Choose routes with cover and elevation over straight-line distance, and never stop the convoy in open ground where it becomes an easy target.
What is the best vehicle for destroying enemy armor?
The artillery tank is the most effective anti-vehicle platform because it can engage from beyond enemy range, but it requires a spotter and good positioning. For close-range work, a rocket launcher on foot or in a scout vehicle is more flexible and cheaper than committing to a heavy tank.
How does the vehicle economy work in WARDOGS?
Every player starts with $10,000, and cash persists across matches. Vehicles are part of the loadout economy purchased with cash, so buying a vehicle means trading off weapons and gear. Teamplay actions like transporting squadmates and controlling objectives earn cash, and the Hot Zone pays double for aggressive play.
Are helicopters worth the investment in WARDOGS?
Yes—helicopters justify their cash cost when used for supply drops and squad transport, since teamplay actions earn persistent cash that funds future loadouts. However, real-world flight models make them fragile investments for novices. Practice in low-traffic zones first, then use them to support convoy pushes and Hot Zone control.